Dental offices carry a unique design challenge: they need to calm anxious patients, support precise clinical work, and project professionalism, all within the same four walls. Unlike residential projects where aesthetics drive decisions, dental spaces must balance function with comfort. Poor lighting can increase patient anxiety. Chaotic color choices distract from care. A cramped layout slows workflows and frustrates staff. Getting the interior design right isn’t just about looking modern, it directly impacts patient retention, staff efficiency, and the bottom line. Whether planning a full buildout or refreshing an existing practice, understanding the mechanics behind calming, functional design makes all the difference.
Table of Contents
ToggleKey Takeaways
- Dental office interior design directly impacts patient anxiety levels, staff efficiency, and business retention—poor lighting, chaotic colors, and cramped layouts measurably increase stress and reduce treatment acceptance.
- Effective dental office interior design relies on four essential pillars: cool-toned colors (soft blues and greens), durable non-porous materials (LVP flooring and quartz countertops), layered LED lighting with tunable color temperatures, and strategic soundproofing between patient areas.
- A well-planned layout with proper zoning (separate public, semi-private, and private areas), 5-foot hallways, 120–180 square foot operatories, and one-way sterilization flow prevents cross-contamination and reduces staff fatigue.
- Comfortable waiting areas featuring upholstered seating, stable furniture, low-stress entertainment, and temperature control at 68–72°F significantly reduce perceived wait times and patient anxiety before appointments.
- High-impact, budget-friendly updates like commercial-grade paint ($40–$70 per gallon), LED fixture replacements, hardware swaps, and accent walls can refresh a practice for hundreds rather than tens of thousands of dollars.
- Test for lead paint and follow safety protocols (OSHA standards, NEC code compliance) before starting any dental office interior design project, and consult structural engineers for load-bearing wall modifications.
Why Interior Design Matters in Dental Practices
First impressions form within seven seconds of entering a space. For dental patients, many of whom arrive already tense, those seconds set the tone for the entire visit. A well-designed office signals competence and care. A dated, poorly lit, or cluttered space does the opposite, no matter how skilled the dentist.
Patient anxiety is measurable. Studies show that thoughtful interior design strategies can lower cortisol levels and reduce perceived pain during procedures. This isn’t fluff, it’s neuroscience. Visual chaos, harsh lighting, and institutional color palettes trigger stress responses.
From a business standpoint, design affects retention and referrals. Patients who feel comfortable are more likely to keep appointments, accept treatment plans, and recommend the practice. Staff benefit too: a logical layout reduces fatigue, and better acoustics improve communication. Ignoring interior design in a dental setting is like skipping surface prep before painting, you’ll see the consequences fast.
Essential Design Elements for a Modern Dental Office
Modern dental design hinges on four pillars: color, materials, lighting, and acoustics. None work in isolation. Get one wrong, and the others can’t compensate.
Color Psychology and Material Selection
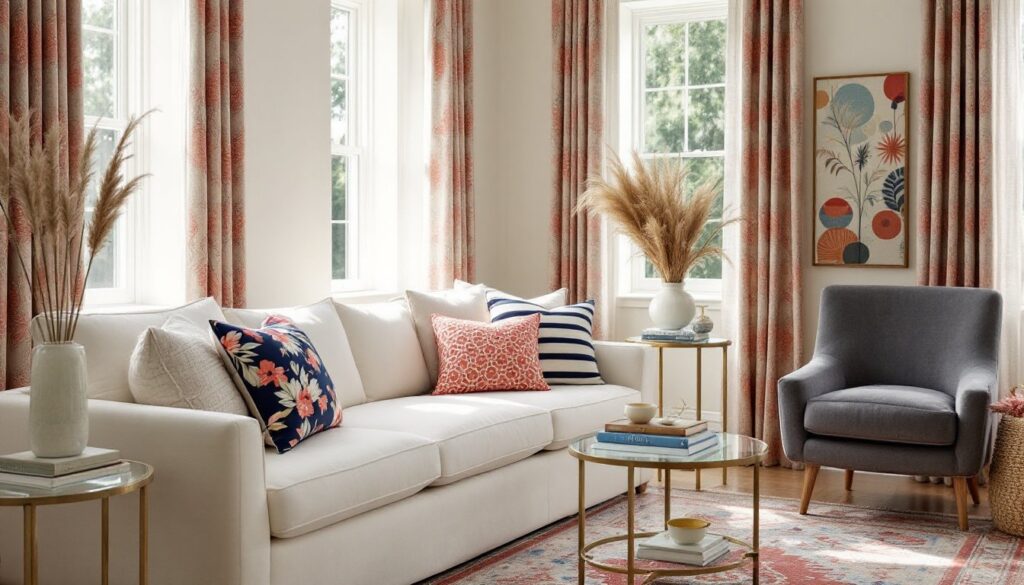
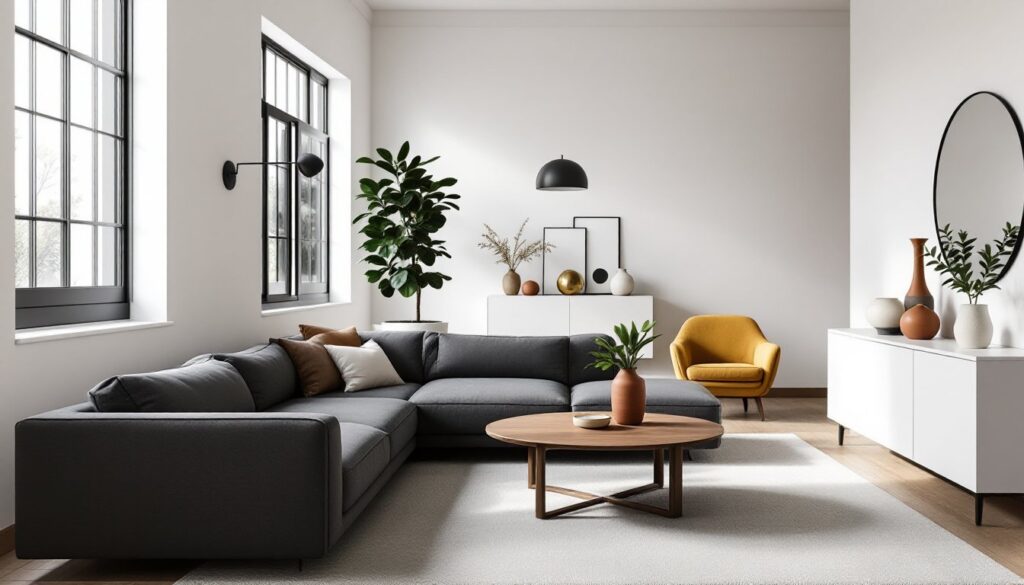
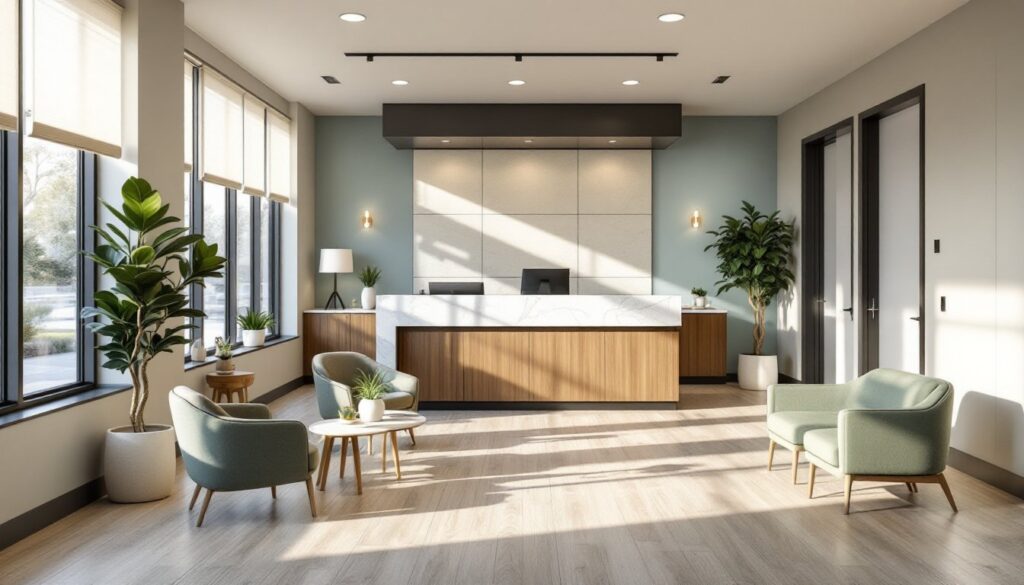
Color impacts mood and perception of time. Cool tones, soft blues, greens, and grays, lower heart rates and create calm. Warm neutrals like taupe and sand add comfort without overstimulation. Avoid stark white walls: they amplify clinical coldness and show scuffs easily.
For materials, durability and cleanability come first. Luxury vinyl plank (LVP) flooring mimics wood without the maintenance headaches. It’s waterproof, quiet underfoot, and meets OSHA slip-resistance standards. Quartz countertops resist stains and don’t harbor bacteria like laminate seams can.
Wall finishes should be scrubbable, look for paints rated for commercial or high-traffic use, typically satin or semi-gloss sheens. Eggshell might look softer, but it won’t survive repeated disinfectant wipes. For accent walls, consider 3D textured panels made from PVC or fiber-reinforced gypsum. They add visual interest and improve acoustics by diffusing sound.
Wood tones bring warmth but require careful selection. Real wood veneers or high-quality laminates work for reception desks and cabinetry. Avoid particleboard in humid climates, it swells. In operatories, stick to non-porous surfaces. There’s a reason examples like a Parisian dental office blend elegance with practical material choices.
Lighting Strategies That Reduce Anxiety
Lighting is the most underestimated design tool in dentistry. Layered lighting, ambient, task, and accent, creates flexibility and reduces harsh shadows that increase patient stress.
Start with tunable LED panels for ambient light. These allow color temperature adjustments throughout the day: cooler (4000–5000K) for focus during morning procedures, warmer (2700–3000K) for late-day appointments. This mimics natural circadian rhythms and reduces eye strain for staff.
Task lighting in operatories must meet ADA and manufacturer specs, typically 1500–2000 lumens for intraoral work. Poor task lighting forces dentists to hunch closer, causing neck strain and patient discomfort.
In waiting areas, avoid overhead fluorescents. They flicker (even imperceptibly) and create institutional vibes. Use recessed LED downlights paired with table or floor lamps for a residential feel. Dimmers are non-negotiable, they let staff adjust intensity based on time of day and patient needs.
Natural light is ideal but tricky. South-facing windows flood spaces with warmth but cause glare on screens. Use cellular shades or UV-filtering film to diffuse light without blocking it entirely. North-facing windows provide even, indirect light, perfect for waiting areas.
Space Planning and Layout Best Practices
Layout dictates workflow. A poorly planned dental office wastes staff time and frustrates patients. Start with zoning: separate public (reception, waiting) from semi-private (consultation rooms) and private (operatories, sterilization) areas.
Reception should have clear sightlines to the entrance and waiting area. A 6–8 foot long counter accommodates two staff members without crowding. Mount transaction surfaces at 42 inches for standing work, with a 30-inch accessible section per ADA requirements.
Operatories need minimum 120 square feet for maneuverability, though 150–180 square feet is more comfortable. Door swings should never block cabinetry or equipment. Use pocket doors or outswing doors where space is tight.
Sterilization areas must follow a one-way flow: dirty instruments enter one side, clean instruments exit the other. This prevents cross-contamination and meets OSHA standards. Plan for 100–150 square feet minimum, with separate handwashing and instrument-processing zones.
Hallways should be 5 feet wide to allow two people to pass comfortably. Narrower corridors feel institutional and create bottlenecks. Widening a hallway during a remodel often requires relocating studs, not a DIY job if it’s load-bearing. Consult a structural engineer and pull permits.
Soundproofing matters. Use staggered-stud walls with roxul insulation between operatories and waiting areas. Standard fiberglass batts don’t cut it for dental drills and suction noise. Add acoustical door seals and solid-core doors (not hollow-core) to operatories.
Creating a Comfortable Waiting Area Experience
The waiting area is where anxiety builds or dissolves. Design it to distract, comfort, and reassure.
Seating is critical. Skip the molded plastic chairs. They’re cheap and look it. Opt for upholstered seating with cleanable fabrics, medical-grade vinyls or crypton-treated textiles resist stains and disinfect easily. Provide a mix: individual chairs for solo patients, small sofas for families. Space seating 24–30 inches apart for personal space.
Coffee tables should be stable and easy to clean. Glass tops show every fingerprint: laminate or quartz works better. Keep surfaces clutter-free. A stack of dog-eared magazines from 2019 signals neglect.
Entertainment options reduce perceived wait times. Mount a TV at 60–65 inches from the floor (center of screen) for comfortable viewing from seated positions. Keep volume low or use closed captions. Avoid news channels, they increase stress.
Children’s areas need durable, washable toys. Avoid fabric books or stuffed animals that can’t be disinfected. Consider a magnetic wall panel or built-in activity table with wipeable surfaces. Platforms like Houzz offer creative pediatric design ideas that balance fun with hygiene.
Plants improve air quality and add life, but they require maintenance. Use pothos, snake plants, or ZZ plants, they tolerate low light and irregular watering. Avoid flowering plants: some patients have allergies. Use ceramic or fiberglass planters that won’t leak or stain floors.
Temperature control is often overlooked. Aim for 68–72°F year-round. Patients in anxiety-mode perceive cold as clinical and unwelcoming. Install a programmable thermostat accessible to staff, not patients.
Budget-Friendly Design Updates You Can DIY
Full dental office remodels run $75,000–$250,000 depending on region and scope. But impactful updates don’t require six-figure budgets. Here’s what DIYers can tackle.
Paint is the highest-ROI update. A gallon of commercial-grade paint covers 350–400 square feet and costs $40–$70. Prep is everything: fill holes with lightweight spackle, sand smooth with 120-grit paper, prime stains with a stain-blocking primer. Use painter’s tape rated for delicate surfaces on trim to avoid pulling existing paint. Two coats minimum for even coverage.
Accent walls add depth without overwhelming a space. Use peel-and-stick wood planks or textured wallpaper designed for commercial use. These install with basic tools, level, utility knife, smoothing tool. Avoid accent walls behind patient chairs: they create visual distractions during procedures.
Lighting upgrades are straightforward if you’re replacing fixtures on existing junction boxes. Swapping outdated fluorescent panels for LED troffers takes 20 minutes per fixture. Turn off the breaker, remove the old fixture, connect the new one (black to black, white to white, ground to ground), and mount. If you’re adding new fixtures or moving electrical, hire a licensed electrician, NEC code requires permits for new circuits.
Hardware updates modernize instantly. Replace dated door handles, cabinet pulls, and light switches with contemporary options. Use satin nickel or matte black finishes, they hide fingerprints better than polished chrome. Most hardware swaps require only a screwdriver.
Signage and wayfinding clarify navigation. Use vinyl wall decals or mounted acrylic signs for room labels and directional cues. Measure carefully and apply with a wet installation method (spray soapy water on the wall) to avoid bubbles.
Artwork softens clinical spaces. Avoid generic stock prints. Commission local artists or purchase pieces that reflect the community. Frame everything, unframed canvas looks unfinished in a professional setting. Hang art at 57–60 inches (center) from the floor, the museum-standard eye level. Use picture-hanging wire and D-rings, not sawtooth hangers, for pieces over 10 pounds.
For structured guidance on planning these updates, developing an interior design proposal helps prioritize projects and allocate budgets effectively. Platforms like ImproveNet provide cost estimators and contractor contacts when DIY reaches its limits. Additional design tips can streamline the refresh process, and rendering software lets practices visualize changes before committing to materials.
Safety note: Wear PPE, safety glasses, dust masks (N95 for sanding), and gloves. Dental offices often have older buildings: test for lead paint before sanding surfaces. If lead is present, hire a certified abatement professional. Don’t risk staff or patient health.